Understanding the Problem: Upstairs Bathroom Leak Ceiling

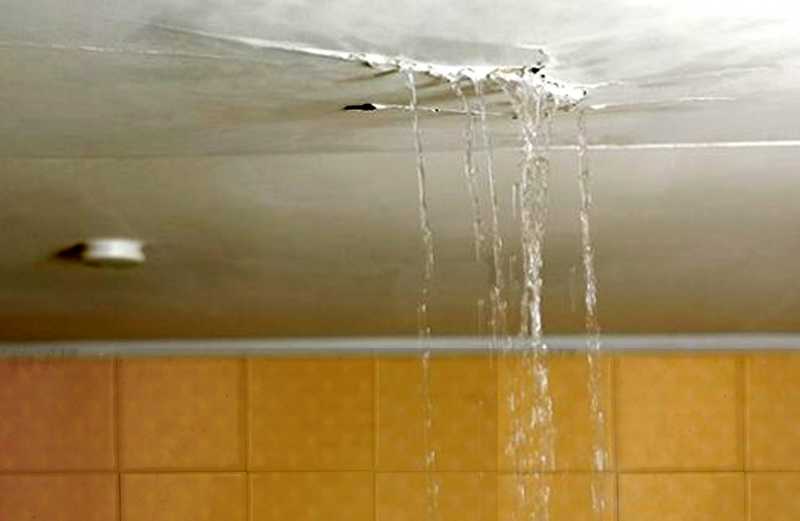
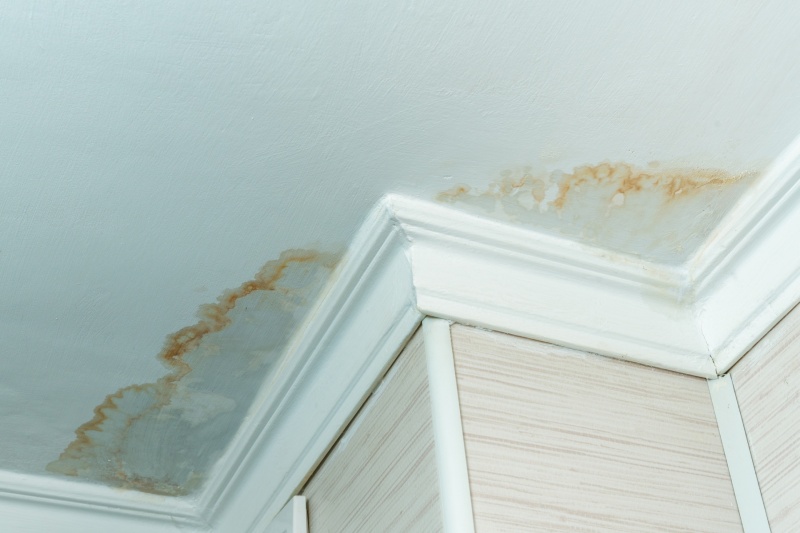
An upstairs bathroom leak that affects the ceiling below can be a frustrating and potentially costly issue. It’s essential to understand the common causes of these leaks and how they impact the ceiling material. This knowledge will help you address the problem effectively and prevent further damage.
Causes of Bathroom Leaks
Leaks in upstairs bathrooms can originate from various sources. The most common causes include:
- Faulty Plumbing: Leaky pipes, loose connections, or corroded pipes are frequent culprits. These problems can occur in the shower, sink, toilet, or bathtub.
- Improper Installation: Incorrect installation of plumbing fixtures or fixtures that are not properly sealed can lead to leaks over time.
- Water Pressure Issues: High water pressure can strain pipes and connections, leading to leaks. Conversely, low water pressure can cause fixtures to malfunction and leak.
- Clogged Drains: A clogged drain can cause water to back up and overflow, leading to leaks. This is particularly common in showers and bathtubs.
Bathroom Ceiling Materials
Bathroom ceilings are typically constructed using materials designed to withstand moisture and humidity. The most common materials include:
- Drywall: Drywall is a popular choice for bathroom ceilings due to its affordability and ease of installation. However, drywall is susceptible to water damage and can warp, sag, or crumble when exposed to prolonged moisture.
- Ceiling Tile: Ceiling tiles are often used in bathrooms for their moisture resistance and aesthetic appeal. However, some types of ceiling tiles can become discolored or warped if exposed to excessive moisture.
- Waterproof Ceiling Panels: Waterproof ceiling panels are specifically designed for use in wet areas. They are made from materials like PVC or fiberglass, which are resistant to moisture and mold growth.
Consequences of Ignoring a Leak
Ignoring an upstairs bathroom leak can have serious consequences, including:
- Structural Damage: Prolonged water exposure can weaken the structural integrity of the ceiling and surrounding walls. This can lead to sagging, cracking, or even collapse.
- Mold Growth: Dampness creates a breeding ground for mold, which can cause respiratory problems, allergies, and other health issues.
- Electrical Hazards: Water damage can compromise electrical wiring, increasing the risk of electrical shocks and fires.
- Increased Repair Costs: The longer a leak goes unaddressed, the more extensive the damage will become, leading to higher repair costs.
Troubleshooting and Inspection

Pinpointing the source of a leak in your bathroom ceiling requires a methodical approach. By systematically inspecting the potential areas of the leak, you can identify the culprit and take appropriate action to fix it. This process involves carefully examining the bathroom fixtures, plumbing system, and roof, using tools like a moisture meter to help you pinpoint the exact location of the leak.
Identifying the Source of the Leak
Before starting your inspection, gather the necessary tools: a flashlight, a moisture meter, and a ladder if needed.
- Examine the Bathroom Fixtures: Begin by inspecting the bathroom fixtures, starting with the toilet. Check for leaks around the base of the toilet, the tank, and the fill valve. Look for signs of water damage around the shower or bathtub, including cracks in the grout or loose tiles. Also, inspect the faucet and showerhead for leaks or drips.
- Inspect the Plumbing System: Next, examine the plumbing system, including the pipes and valves. Look for any signs of leaks or drips, especially in areas where pipes pass through walls or ceilings. Check for loose or corroded pipes, as these are common culprits for leaks.
- Investigate the Roof: If the leak seems to be coming from the roof, carefully inspect the roof for signs of damage. Look for missing or damaged shingles, cracked tiles, or gaps in the roof flashing. Check for any signs of water penetration, such as water stains or mold.
Differentiating Plumbing Leaks from Roof Leaks
To determine whether the leak originates from the plumbing system or the roof, pay attention to the following:
- Location of the Leak: If the leak is located directly above a bathroom fixture, such as a toilet or shower, it’s likely a plumbing leak. If the leak is more widespread and appears in multiple areas of the ceiling, it could be a roof leak.
- Water Flow: A plumbing leak often involves a constant flow of water, while a roof leak might be intermittent, depending on the weather conditions.
- Time of Day: Plumbing leaks usually occur during times of high water usage, such as during showers or when the toilet is flushed. Roof leaks, on the other hand, may occur during periods of heavy rain or snow.
Using a Moisture Meter
A moisture meter is an invaluable tool for pinpointing the exact location of a leak. This device measures the moisture content of materials, allowing you to identify areas with elevated moisture levels.
- Using the Moisture Meter: To use a moisture meter, simply place the probes against the surface you want to test. The meter will display a reading that indicates the moisture level. Higher readings suggest a leak is present.
- Interpreting the Readings: Most moisture meters come with a scale that indicates the moisture levels. A reading within the normal range indicates that the area is dry. A reading above the normal range suggests that the area is wet and may indicate a leak.
- Pinpointing the Leak: By systematically testing different areas of the ceiling, you can use the moisture meter to pinpoint the exact location of the leak. This will help you determine the source of the leak and make necessary repairs.
Repair and Prevention

Once you’ve identified the source of your upstairs bathroom leak, it’s time to get to work on the repair. The specific methods will vary depending on the cause of the leak, but there are some common approaches you can take.
Repair Methods, Upstairs bathroom leak ceiling
Repairing an upstairs bathroom leak involves addressing the root cause, which could be faulty pipes, leaky fixtures, or roof damage. Here are some common repair methods:
Replacing Pipes
- Copper pipes: If your pipes are made of copper and have corroded or developed pinholes, you’ll need to replace them. This involves cutting out the damaged section and soldering in a new piece of pipe. You’ll need a pipe cutter, a soldering iron, flux, and solder to complete this repair.
- PEX pipes: PEX pipes are a popular alternative to copper, as they are more flexible and resistant to corrosion. Replacing a section of PEX pipe is a relatively simple process that involves cutting the damaged section, inserting a new piece, and securing it with clamps or crimp rings. You’ll need a PEX cutter, clamps or crimp rings, and a PEX pipe expander to complete this repair.
- PVC pipes: PVC pipes are often used for drain lines and are known for their durability. Replacing a section of PVC pipe involves cutting the damaged section, inserting a new piece, and gluing it in place. You’ll need a PVC pipe cutter, PVC primer, and PVC cement to complete this repair.
Sealing Fixtures
- Showerheads: Leaky showerheads are a common problem and can be easily fixed by replacing the O-rings or washers. You’ll need a wrench to remove the showerhead and a new O-ring or washer to complete the repair.
- Faucets: Leaky faucets can be caused by worn-out washers, O-rings, or cartridges. Replacing these parts is a relatively simple repair that can be done with a wrench and a new washer, O-ring, or cartridge.
- Toilets: Leaky toilets are often caused by a worn-out flapper or fill valve. Replacing these parts is a straightforward repair that can be done with a screwdriver and a new flapper or fill valve.
Repairing Roof Damage
- Shingles: If the leak is coming from the roof, it’s likely that some of the shingles are damaged or missing. You’ll need to replace the damaged shingles with new ones. You’ll need a hammer, roofing nails, and a new shingle to complete this repair.
- Flashing: Flashing is a metal strip that helps seal around roof penetrations, such as chimneys and vents. If the flashing is damaged, it can lead to leaks. You’ll need to replace the damaged flashing with new flashing. You’ll need a hammer, roofing nails, and a new piece of flashing to complete this repair.
Preventative Maintenance
Regular maintenance can help prevent future leaks in your upstairs bathroom. Here’s a preventative maintenance checklist:
- Inspect pipes for leaks: Regularly check your pipes for signs of leaks, such as dripping, corrosion, or pinholes.
- Check fixtures for leaks: Inspect your showerhead, faucets, and toilet for leaks. If you find any leaks, repair them promptly.
- Inspect roof for damage: Regularly inspect your roof for signs of damage, such as missing shingles, damaged flashing, or cracked tiles.
- Clean gutters: Clogged gutters can lead to water damage, so it’s important to clean them regularly.
- Check water pressure: High water pressure can put stress on your pipes and fixtures, increasing the risk of leaks. If your water pressure is too high, have it adjusted by a plumber.
- Insulate pipes: Insulating your pipes can help prevent freezing and bursting, which can lead to leaks.
Upstairs bathroom leak ceiling – Dealing with an upstairs bathroom leak that’s causing ceiling damage? It’s a real headache, but while you’re tackling the leak, consider adding a touch of organization and style to your bathroom with a stainless steel rack for bathroom.
These racks are durable, rust-resistant, and offer a sleek, modern look that complements any bathroom décor. Once the leak is fixed, you’ll be ready to enjoy a refreshed and functional space.
A leaky upstairs bathroom ceiling can be a real headache, but don’t let it dampen your spirits! While you’re tackling that plumbing issue, consider adding a touch of elegance to your bathroom with stylish bathroom window tier curtains. These curtains can instantly elevate the look of your bathroom, creating a spa-like ambiance that’ll help you forget all about that leaky ceiling for a while.